- Home
- Creative Ways to Use Contact Paper for Cabinet Makeovers and Home Decor
Aug . 16, 2024 17:11 Back to list
Creative Ways to Use Contact Paper for Cabinet Makeovers and Home Decor
Using Contact Paper to Refresh Your Cabinets A Creative DIY Guide
In the world of home decor, the quest for affordable yet stylish solutions is an ongoing journey. One innovative option that has gained popularity in recent years is contact paper. This versatile, adhesive material can transform your cabinets from drab to fab with a relatively straightforward DIY project. Whether you’re looking to update your kitchen, bathroom, or any other cabinetry, using contact paper can breathe new life into your space without the hefty price tag of a renovation.
Why Choose Contact Paper?
Contact paper is a self-adhesive vinyl film that comes in a plethora of colors, patterns, and finishes. Its affordability allows homeowners to experiment with different styles without a long-term commitment. Whether you prefer a rustic wood grain, sleek marble, or a vibrant pattern, there’s a contact paper design for everyone. It's also available in various textures, including glossy, matte, and textured finishes, allowing for diverse aesthetic options.
Additionally, contact paper is relatively easy to apply. Unlike traditional wallpaper or paint, which often requires extensive preparation and time, contact paper can be installed quickly. All you need are a few basic supplies a clean surface, a measuring tool, a utility knife, scissors, and a smoothing tool or credit card to eliminate air bubbles. This ease of installation makes it one of the most user-friendly options for DIY enthusiasts.
Step-by-Step Application Process
1. Preparation Start by cleaning the surfaces of your cabinets to ensure that there’s no dust or grease. This will help the contact paper adhere better and create a smoother finish.
2. Measure and Cut Measure the dimensions of your cabinet doors and drawers, then cut the contact paper into pieces that will cover those areas. Always measure twice and cut once to ensure accuracy.
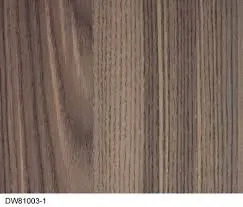
using contact paper to cover cabinets products

3. Peel and Stick Begin at one corner of the cabinet door or drawer and peel back a small section of the adhesive backing. Carefully stick the contact paper onto the cabinet, smoothing it out as you go. Use a smoothing tool or credit card to push out air bubbles and ensure a tight seal.
4. Trim Excess Once the paper is securely applied, use your utility knife to trim any excess material along the edges for a neat finish. Work slowly to avoid any accidental cuts into the wood surface beneath.
5. Finishing Touches After applying contact paper to all desired surfaces, consider adding new hardware or decorative knobs to further enhance the overall look. This small touch can bring your cabinets from ordinary to extraordinary.
Maintenance and Durability
One of the significant benefits of using contact paper is its durability. Most contact paper is resistant to moisture and can withstand the rigors of daily use, especially in areas like kitchens and bathrooms. To maintain your newly refreshed cabinets, simply wipe down the surfaces with a damp cloth and avoid harsh chemicals that could damage the adhesive.
Final Thoughts
Using contact paper to cover cabinets is an excellent way to embrace creativity while being budget-conscious. With just a few hours of effort, you can create a fresh and modern look tailored to your style. Whether you’re revamping an old kitchen or adding some flair to bathroom cabinetry, contact paper offers a stylish solution that transforms spaces quickly and affordably. Embrace the DIY spirit—unleash your creativity with contact paper and enjoy the satisfaction of a job well done!
Latest news
-
High-Quality Bathroom Cabinet Contact Paper – Durable & Stylish Leading Suppliers, Exporters, Manufacturers
NewsJul.08,2025
-
Premium Wood Contact Paper for Desk – Reliable Suppliers & Exporters
NewsJul.08,2025
-
Premium Contact Paper for Table Top – Durable & Stylish Surface Solution from Leading Manufacturer
NewsJul.07,2025
-
Duplex Board with Grey Back - Reliable Supplier & Competitive Price Manufacturer & Exporter
NewsJul.07,2025
-
Premium White Contact Paper on Cabinets – Trusted Exporters & Suppliers
NewsJul.06,2025
-
High-Quality Duplex Board Packaging for Food Reliable Manufacturer & Supplier
NewsJul.06,2025

