- Home
- Applying Contact Paper on Cabinets for a Fresh and Stylish Update
Nov . 09, 2024 20:15 Back to list
Applying Contact Paper on Cabinets for a Fresh and Stylish Update
Utilizing Contact Paper on Cabinets A Stylish and Affordable Makeover
When it comes to home improvement, enhancing the look of cabinets is one of the easiest and most affordable ways to refresh your space. Contact paper, also known as adhesive vinyl or shelf liner, has gained popularity among DIY enthusiasts for its versatility, stylish designs, and ease of application. If you're considering a cabinet makeover, using contact paper can breathe new life into your kitchen, bathroom, or any other cabinetry without the commitment of permanent changes.
Why Choose Contact Paper?
The charm of contact paper lies in its ability to resemble various materials, including wood, marble, and metal, for a fraction of the cost of traditional materials. It’s available in a wide array of colors, patterns, and textures, meaning there’s something to suit every aesthetic, whether you prefer a modern minimalist look or a vintage retro vibe.
Moreover, contact paper is an ideal option for renters or those who want to try out a new look without the fear of ruining an expensive finish. Since it’s removable, it allows for experimentation and change without the long-term commitment that painting or refinishing entails.
Easy Application Process
One of the significant advantages of contact paper is its straightforward application process. Before you start, gather your materials clean the cabinet surfaces, a utility knife or scissors, a measuring tape, and a smoothing tool (like a credit card) for achieving an even finish.
1. Clean the Cabinets Start with a clean slate. Wipe down your cabinets with soap and water to remove grime and grease. This ensures proper adhesion of the contact paper.
2. Measure and Cut Measure the surfaces of your cabinets to determine how much contact paper you’ll need. Leave a little extra at the edges for adjustments and trimming.
3. Apply the Contact Paper Peel back a small section of the backing and begin to stick the contact paper to the cabinet, aligning it carefully. Use your smoothing tool to push out air bubbles and ensure a smooth application. Work slowly and carefully, gradually peeling more of the backing as you go.
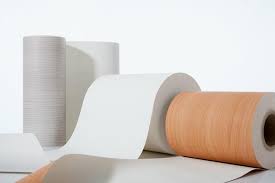
using contact paper on cabinets product

4. Trim the Edges Once the paper is applied, use your utility knife or scissors to trim the excess material around the edges and corners for a neat finish. Take your time to ensure clean lines.
Styling Options
The design options with contact paper are nearly limitless. You might opt for a classic white marble look to give your kitchen a sophisticated feel, or choose bright, funky patterns to add personality to a child’s playroom. The beauty of contact paper is that it allows for creativity and self-expression without a hefty price tag.
In addition to cabinets, contact paper can be used on other surfaces such as countertops, shelves, and even furniture pieces, creating a cohesive look throughout your space. You can even mix and match patterns for a unique decor style. For example, pairing a floral design on cabinet doors with a solid color on the drawers can create an eye-catching contrast.
Maintenance and Durability
Contact paper is generally durable and can withstand everyday wear and tear. Cleaning is simple; just wipe with a damp cloth. However, avoid harsh chemicals that can damage the adhesive.
It's important to note that while contact paper is resilient, excessive moisture can weaken the adhesive, especially in areas like bathrooms. To prolong its lifespan, ensure proper ventilation in areas prone to humidity.
Conclusion
Using contact paper on cabinets is a fantastic way to achieve a stylish, updated look in any room without spending a fortune. This inexpensive and versatile solution allows for creativity and personal touches, making it perfect for renters and homeowners alike. Whether you want a chic, modern kitchen or a fun and colorful bathroom, contact paper offers endless possibilities for transformation. So go ahead, unleash your inner designer, and give your cabinets the makeover they deserve!
Latest news
-
High-Quality Bathroom Cabinet Contact Paper – Durable & Stylish Leading Suppliers, Exporters, Manufacturers
NewsJul.08,2025
-
Premium Wood Contact Paper for Desk – Reliable Suppliers & Exporters
NewsJul.08,2025
-
Premium Contact Paper for Table Top – Durable & Stylish Surface Solution from Leading Manufacturer
NewsJul.07,2025
-
Duplex Board with Grey Back - Reliable Supplier & Competitive Price Manufacturer & Exporter
NewsJul.07,2025
-
Premium White Contact Paper on Cabinets – Trusted Exporters & Suppliers
NewsJul.06,2025
-
High-Quality Duplex Board Packaging for Food Reliable Manufacturer & Supplier
NewsJul.06,2025

